
Cutting Vinyl Rolls
Cutting vinyl rolls is an excellent way to add custom graphics to many different types of materials. Banners, windows and signs are just a few examples of applications that can be created using cut vinyl.
First, set your machine to “kiss cut” by following the prompts in Design Space. Next, select your vinyl setting from the list of available options.
Vinyl Cutters
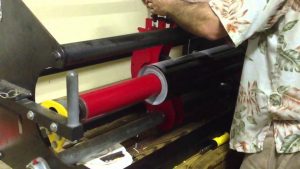
A vinyl cutter uses a blade to cut the outline of a design into a roll of adhesive vinyl. This allows for a wide range of custom made products including store windows, vehicle decals and signage. It is also used to create stencils for use in art and craft projects. The vinyl can be applied to a variety of surfaces such as walls, doors and windows and then covered with a transfer tape that makes it easily cleanable.
To use a vinyl cutter you will need a computer with design software that is compatible with the machine. There are free and basic programs that can be downloaded online, but more advanced and professional software packages are available for purchase. The minimum specifications for a computer are 4GB of RAM and a 2.0GHz processor.
Most vinyl cutters are designed to work with a specific type of vinyl and can be optimised for that material. This is because different types of vinyl have slightly different characteristics that may require a particular blade tip depth or cutting pressure. You will probably need to adjust the settings for each new roll of vinyl you try.
Many vinyl cutters can also be used to cut other materials such as paper, card and plastic sheets. The Cutting Vinyl Rolls maximum media size that can be cut depends on the machine and is usually listed in the product specifications.
Vinyl Cutting Mats
When working with vinyl, it’s important to use a good quality mat. The mat keeps the vinyl firmly in place while it is being run through the cutting machine. It also helps prevent the vinyl from tearing as it’s being removed from the mat. Mats are available with different levels of stickiness, which allows you to choose the right one for the type of material you’re working with. For example, if you’re cutting thinner materials like paper or cardstock, you’ll want to use a mat with less sticky grip than if you’re working with heavyweight vinyl.
To get the most out of your vinyl mat, make sure it’s clean before every use. Start by removing the clear plastic-like cover that comes attached to the mat. This protects the mat and keeps it from getting covered in dust and lint when it’s not being used. Always replace this protective sheet on your mat after each use.
Next, wipe the entire surface of the mat with alcohol-free baby wipes. This will remove any lint or debris that might be on the mat and help it stay sticky for longer. Finally, apply a thin coat of scotch tape around the edges of your mat if you’re going to be using it with materials that have a backing. This will keep any glue from sticking to the parts of your mat that feed into and out of your machine, which can negatively affect how your designs cut.
Vinyl Transfer Tape
Using vinyl transfer tape will allow you to place your custom-cut designs on merchandise. This will help prevent wrinkling and bubbling while also ensuring the vinyl sticks properly to your desired surface. TeckWrap Craft offers two different types of transfer tape, including one with and without grid lines for easier workflow. Choose the matte type for projects that require a low tack and the gray grid high tack transfer tape for a medium tack.
Once you have cut your design with the Silhouette or Cricut Cameo and used a weeding tool to remove any excess vinyl, you can start applying your graphic. First, cut a piece of transfer tape slightly larger than the vinyl you are working with. This will give you a little wiggle room when it comes time to remove the backing paper.
Use a scraper or your hands to smooth down the front of the transfer tape. If you’re applying a large graphic, make sure to work slowly. Start at the edge closest to you and work your way towards the other end.
Next, place the transfer tape on top of your vinyl and press down. Cutting Vinyl Rolls Use a burnishing tool to help you achieve a crisp, clean graphic. When you’re done, remove the transfer tape and your new sticker is ready to be applied.
Vinyl Supplies
We carry a wide variety of vinyl supplies from some of the most trusted brands in the business. We make it easy to find what you need to create one-of-a-kind shirts, gifts, or home décor items. You’ll find heat transfer vinyl (HTV) and permanent sticker vinyl in many colors, styles and finishes.
Some rolls of vinyl may come with a layer of paper between layers to keep the plastic from sticking to the packaging, but be careful not to store these rolls with the paper long term as it can cause them to fog and distort. When measuring and cutting your vinyl, it is a good idea to unroll it slightly and let it rest overnight before starting to give the material a chance to shrink slightly.
When applying your vinyl, if you notice any air pockets, it is a good idea to use an air release tool to pop them. If you don’t have an air release tool, you can also use your fingernail to poke the bubbles, but be careful not to prick the vinyl itself.
If you need help weeding your vinyl, be sure to check out our selection of professional weeding tools. This is a necessary step for most vinyl projects, and removing the tiny bits of extra vinyl from your project can make all the difference in the final product.